
Climbing Wall for Kiddos: Building Instructions Manual
I made this wall for my daughter when she was a year old. We love it so much that I wanted to share it with you! It’s an A-frame design with a ladder and cargo net made from my old climbing rope on one side, and toddler spaced holds on the other side. The underside of the A-frame we turned into her fort/reading nook. The whole thing is collapsible for easy storage!

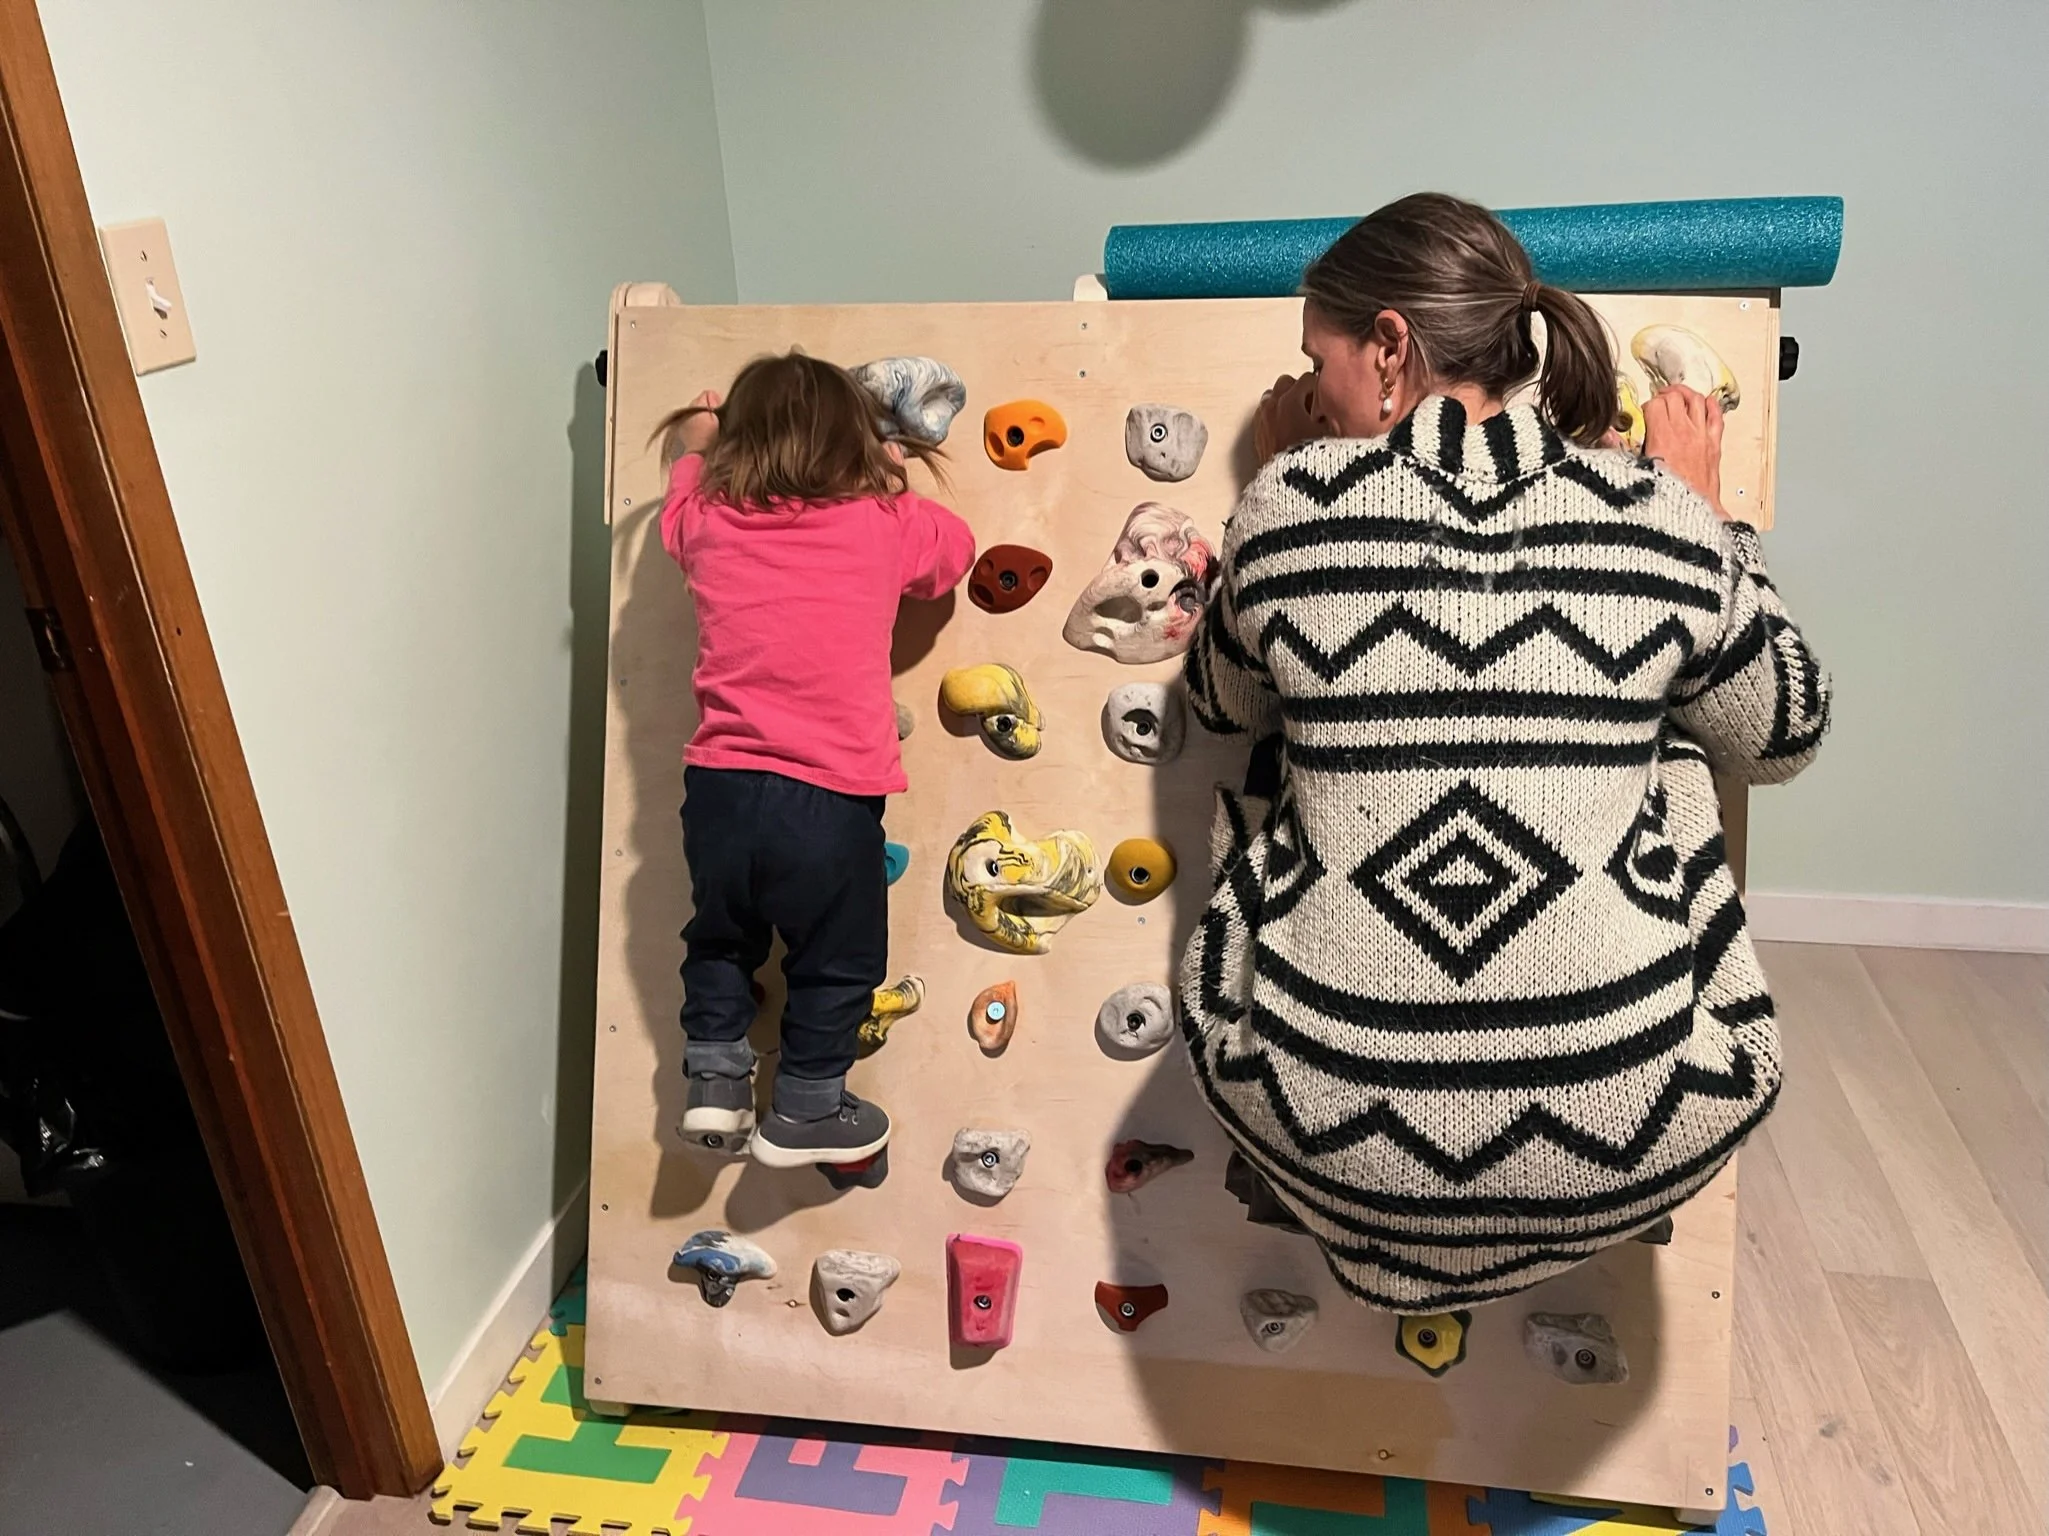
FINAL PRODUCT!! See below for all the instructions
-40˚C activities
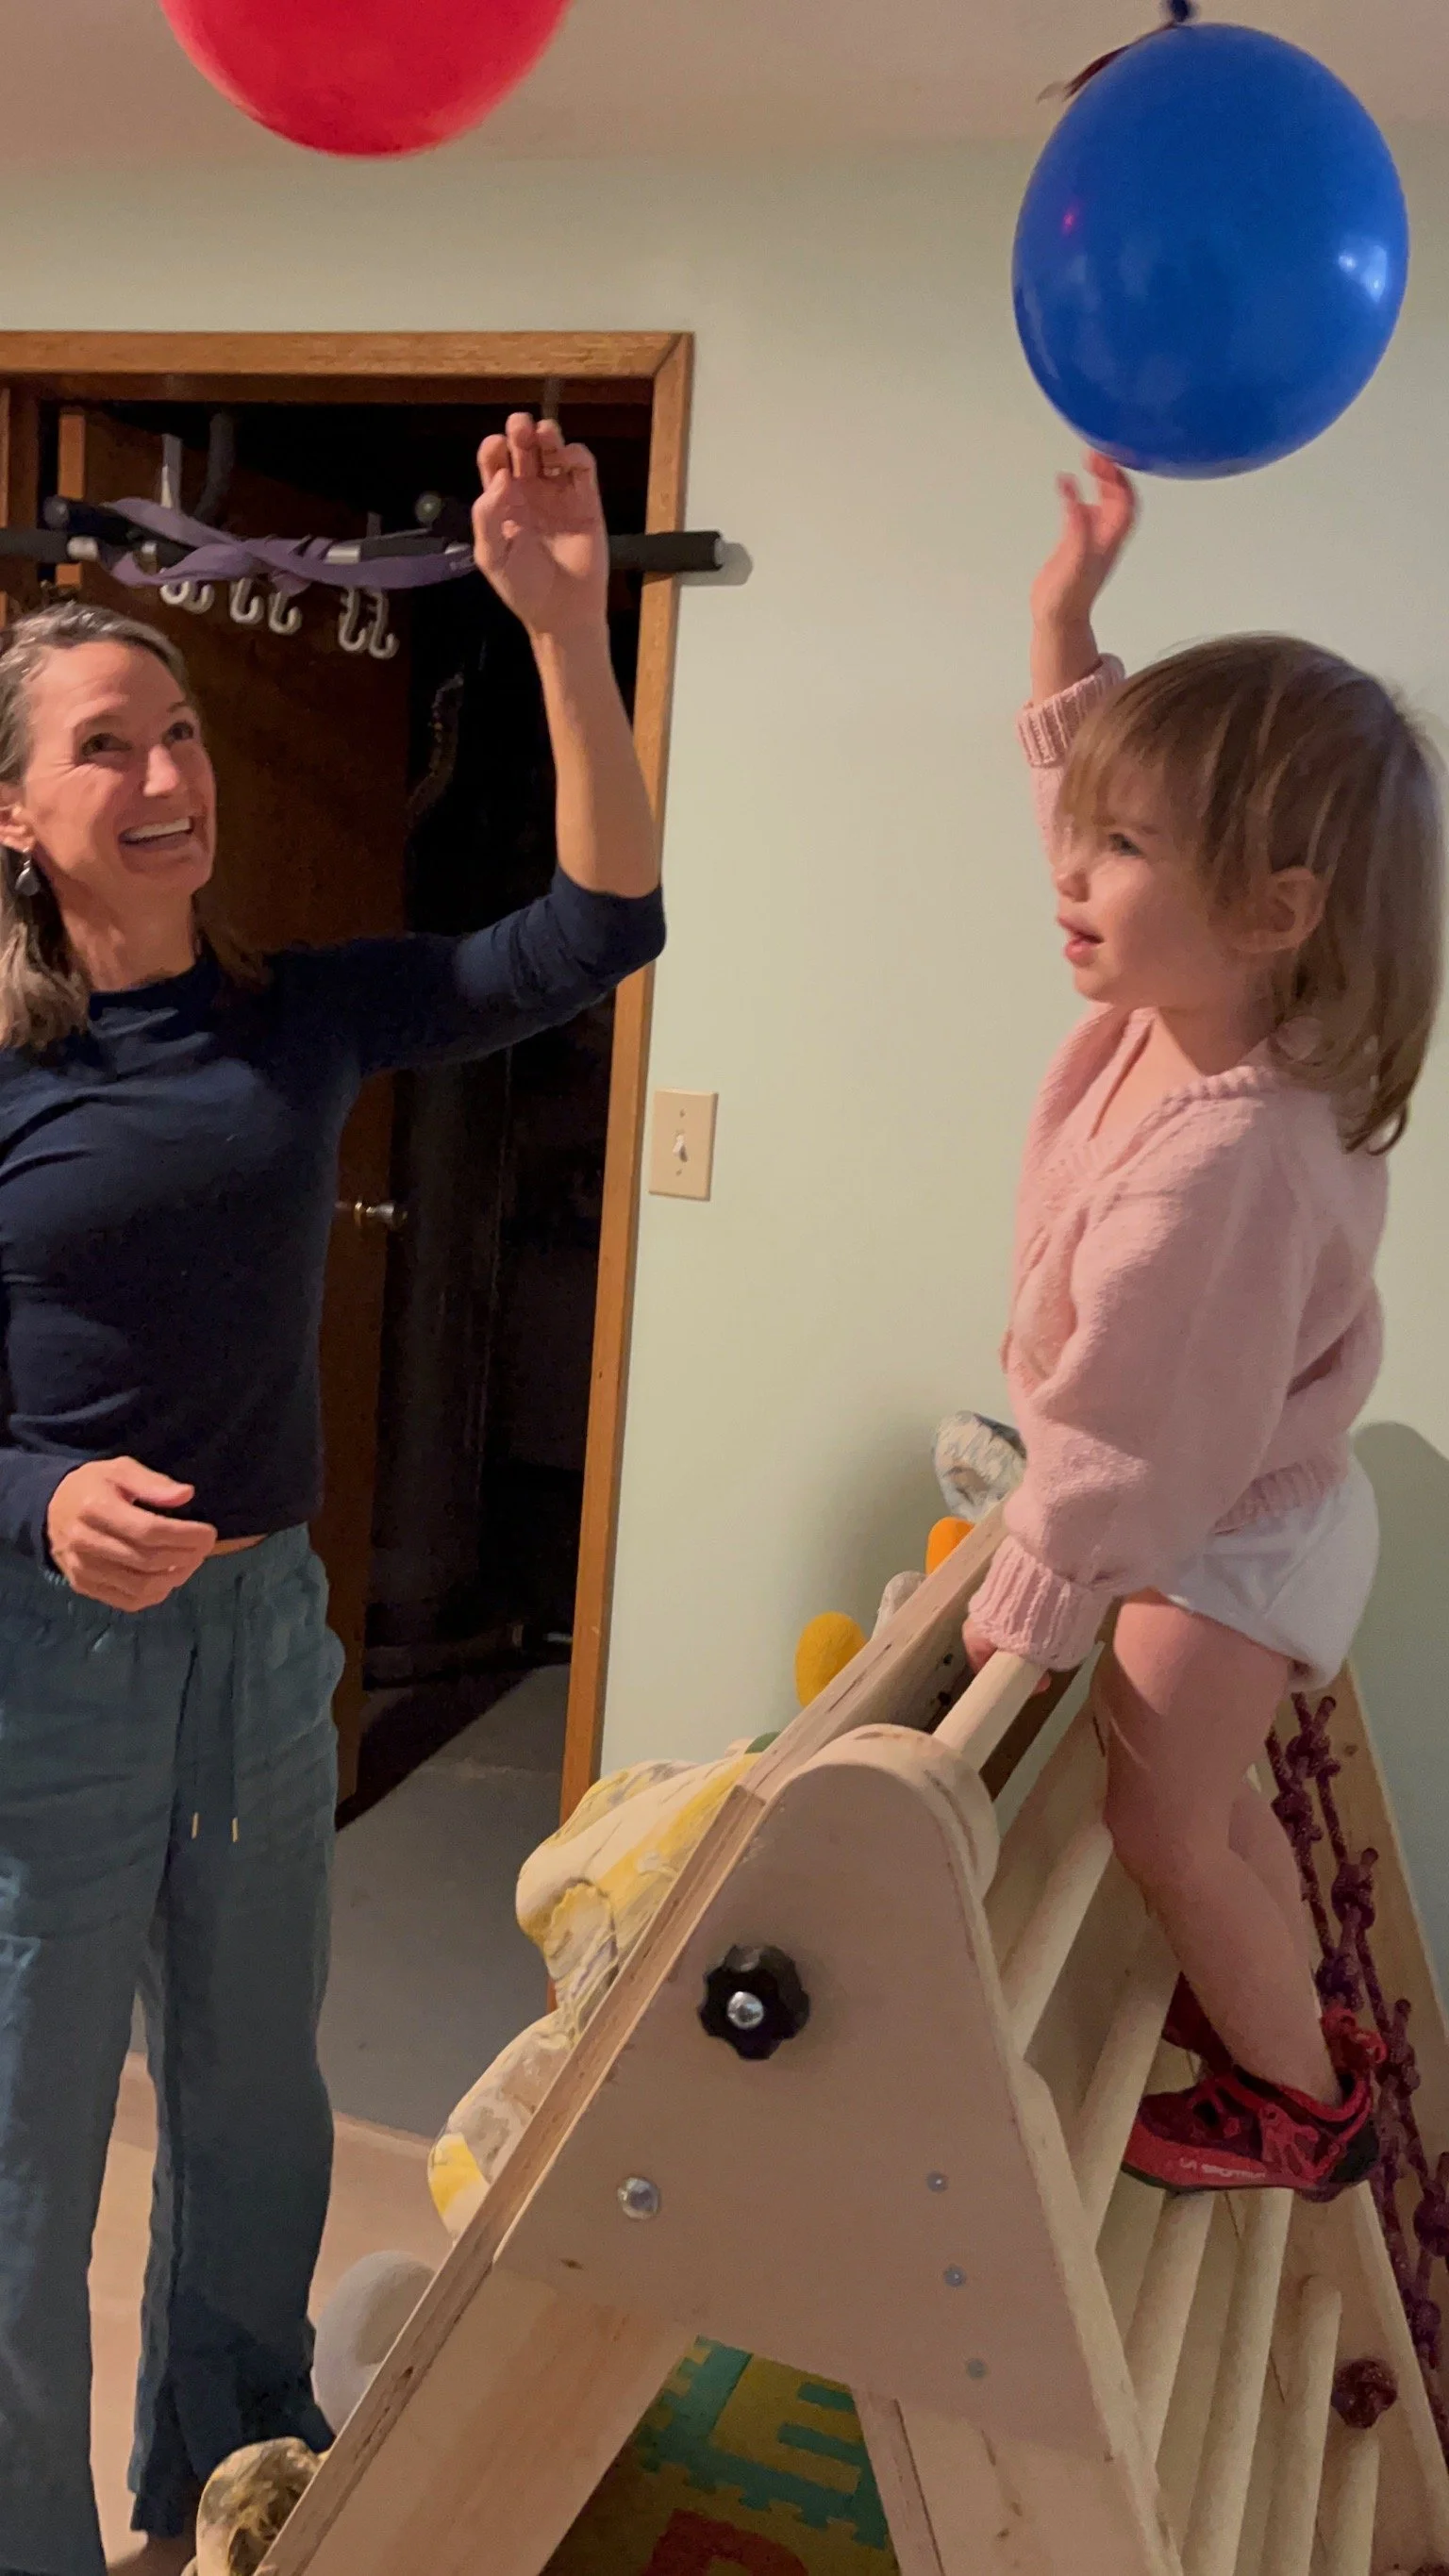
Balloons at the top are good motivation!
Climbing wall for kiddos:
Materials:
- 100pc-#8 x 2.5” wood screws
- 100 pc- #8 x 1.75” wood screws
- 2- 5/16”x 2.5” carriage screws
- 40ft used climbing rope (Hanger, Rocky)
- 50 3/8”x 2’ square head/martini bolts (MEC, Lee valley, Calgary Fastners)
- 50 3/8” Tnuts (MEC, Lee valley, Calgary Fastners)
- 49 climbing holds
- 2- 5/16” x 2.5” Hillman clamping knobs/ plastic adjustable knob screws (Lee valley, Calgary Fastners, Lowes, amazon)
- 2- 5/16” T nuts (Lee valley, Calgary Fastners)- whatever matches the knobs
- 7- 1” x 48” dowels
- 1 sheets- 3/4” x 4’ x 8’ FINISHED/sanded plywood
- 1 sheet- ¾” x 2’ x 4’ FINISHED/sanded plywood (or 10” x 40” scrap if you have it)
- 4- 2” x 4” x 8’ planks
- Belt sand paper- ___ grit & ___ grit
- Hand sander paper- ___ grit & ___ grit
- +/- milk or chalk paint
Tools:
- Drill press
- Bench compass/protractor
- 1” Forstner bit
- Drill
- 7/16” drill bit (holes for climbing holds T nuts)
- 1/2” drill bit (holes for climbing rope- cargo net)
- 3/8’ drill bit (holes for 5/16’ Tnuts)
- 5/32” drill bit (pilot holes for #8 screws)
- 5/16’ drill bit (pilot hole for carriage bolt & Knob screw)
- Hot knife OR scissor + lighter (to cut climbing rope)
- Table saw OR circular saw + straight edge (if you aren’t getting wood pre-cut)
- Miter saw
- Jig saw (for rounding ends)
- Belt sander
- Hand sander
- Clamps
Cut list:
- 6- 1”x 48” dowels→ cut in half= 12- 1”x 24” dowels (keep 1 dowel full length)
- 1- 3/4” x 4’ x 8’ FINISHED/sanded plywood sheet→ cut to
1- 3/4” x 4’ x 4’ (climbing wall)
1- 3/4” x 4’ x 40.5” (backing for cargo net/ladder)
- 4- 2” x 4” x 8’ planks→ Cut to:
2- 2” x 4” x 51” (legs of climbing wall)
3- 2”x 4” x 45” (legs of ladder/cargo net wall)
1- 2” X 4” X 44 ¾” (cross beam on back of climbing wall)
1- 2” X 4” X 6” (middle piece to hold top rung. Could cut to 27” if you want it to run to the cross beam on back of climbing wall)
2- 2” X 4” X 20.5” (top/bottom frame for cargo net)
- 1 sheet- ¾” x 2’ x 4’ FINISHED/sanded plywood→ cut to 2- 10” x 12” squares
Construction:
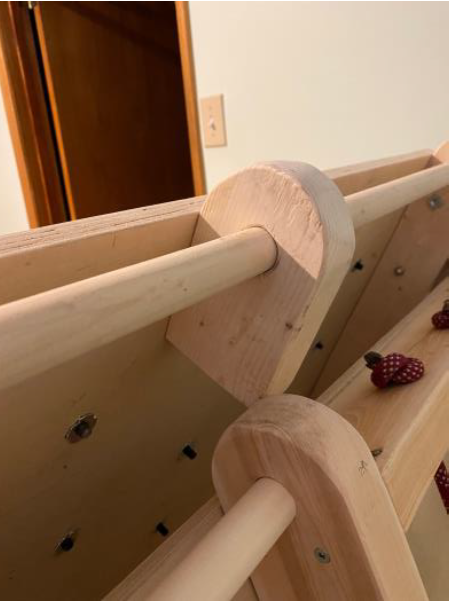
1. Round ends of legs: measure 1 ¾” from the end of end of each leg and middle piece for top rung (highlighted in cut list above). Place the end of the compass in mark. Set compass to 1 ¾’. Use the compass to mark rounded ends. Use jig saw to make cuts. Use band sander to smooth cuts
2. Drill holes for ladder: On two of the three 45” legs, measure 1 ¾” from the end to mark the first hole and measure every 4” across. This should give you 11 holes with the last one ~ 3” from the end. Use the 1” forstner bit + drill press to drill ½” depth for the ladder rungs to seat. Use the 5/32” drill bit to drill a pilot hole the rest of the way through (this will help with aligning screws into the ladder rungs later)
On the two 51” legs, measure 1 ¾” from the end to mark the hole. Use the 1” forstner bit + drill press to drill ½” depth for the ladder rungs to seat
On the one 6” middle piece to hold top rung, measure 1 ¾” from the end to mark the hole. Use the 1” forstner bit + drill completely through the wood. Ensure the forstner bit is perpendicular to the wood
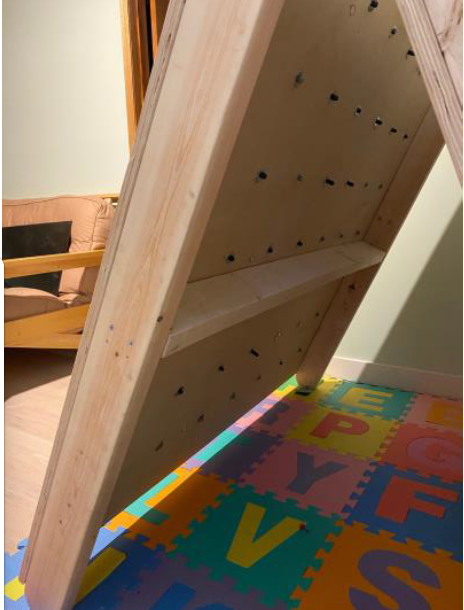
3. Cut Triangles for the end: (you can change the angle of top depending on what pitch you want the sides to have and the size of your footprint but you may have to do some trig calculations ☺). I used cut 10” x 12” squares of ¾” finished plywood because I had extra scrap from another project. Unfortunately, if you are using just one sheet of finish plywood, you will only have 7.5” x 48” of plywood remaining after making your above cuts which is why you need to buy another ¼ sheet of finished plywood on the materials list. Cut top angle to 45˚ (22.5˚, angle ß, in each direction on miter saw). This will make the pitch of the wall ~ 67˚ (angle ∂). Round the top the top of the climbing wall legs to outline

4. Sand all surfaces. Paint if desire
5. Construct Ladder: Wood glue ladder holes. Place rungs in both legs and square up with right angle. Drill pilot holes through legs into rungs with 5/32” drill bit. Secure with #8 x 2.5” wood screws

6. Construct ladder/cargo net side: Lay out the ladder on the left side of the 3/4” x 4’ x 40.5” plywood backing for cargo net/ladder side. Note the legs should overhang over hang ~ 1 3/4” above and below where the legs are rounded.
Align the two 2” X 4” X 20.5” top/bottom frame for cargo net 2” from the top and bottom of the right leg of the ladder respectively. This should line up with the top and bottom of the plywood. Adjust as needed. Align the far right leg (the outside of the cargo net frame). Ensure that it aligns with the right side of the plywood backing. If it doesn’t cut the top/bottom pieces for the frame for cargo net as necessary to ensure the ladder and cargo net frame are plum with the plywood frame. Once measurements are verified, secure cargo net frame to the ladder using #8x 2.5” wood screw. Then secure the frame to the plywood backing using #8 x 1 ¾” screws.

7. Construct Climbing Wall side: Lay out the 51” legs on either side of the 3/4” x 4’ x 4’ plywood for climbing wall. Note the legs should overhang over hang ~ 1 3/4” above and below where the legs are rounded. Place the 2” X 4” X 44 ¾” cross beam on back of climbing wall between the 2 legs. Seat long dowel between the holes at the top of the 2 legs. Determine how much you will need to trim the dowel (should be ~46 ¼”) and cross beam so that the legs align with the sides of the plywood. Once verified, feed the 6” center piece over the dowel. Wood glue the holes in the legs and secure the dowel with screws as with the ladder. Secure the cross beam to the legs. Position will depend on layout of Tnuts and climbing hold placement (see below)
8. Climbing hold layout: determine spacing for climbing holds. I used 6” grid which gave me 49 holds. The cross bar had to be placed off center (at 22 ½” from the bottom to avoid interfering with holds .
Measure out grid. Drill holes perpendicular to plywood with 7/16” drill bit. Hammer in T-nuts (make sure they are square with hole)


Hindsight, I wish I had started my bottom row 3” from the bottom and spaced it 6” apart above and to the side from there. This would have been more conducive to little legs and given me another row for holds at the top. I could have also put the cross bar in the center of the legs (at 25 ½”)
9. Secure legs to triangles: Using clamps, secure the legs to the triangles so that the top of the 51” leg is aligned with the top of the rounded edge of the triangle, and the side of the leg is flush with the side of the triangle. Abut the 46” legs top with the inside of the 51” leg ensuring the side is flush with the triangle. Secure the shorter leg to triangles with three #8 x 1 ¾” screws.
To secure the long legs: measure 2” x 2” from the bottom corner of the triangle. Drill 5/16” pilot hole for 2.5” carriage bolt. Bang carriage bolt into hole and secure cap. Measure 2” x 4” from the top corner of triangle and drill 5/16” pilot hole. From the other side (on the leg) drill slightly into leg with 3/8” drill bit for Tnut. Bang in 5/16” Tnut. Screw in plastic knob screw. Remove clamps. (for wall to fold, remove plastic knobbed screw)


10. Make cargo net: use the ½” drill bit (or drill bit consistent with thickness of rope) to drill holes 1” down from the outside of the frame, every ~5 1/8” on the top/bottom of cargo net frame and every 5 ½” on the sides (watch for ladder rungs on the one side). Hand sand as needed but knots will cover many of the rough edges.
Use hot knife to cut Climbing rope into 6 x 40+” pieces, 3 x 80+”. Feed ends through top and ladder side holes. Tie knots and pull taut. Weave cargo net: https://youtu.be/mFexAt2UCgY. Tie crown knots for cargo net every 5 ish”. Sinch up and tie knots on outside and bottom.

11. Add climbing holds!!

FINAL PRODUCT!!